
You can create or edit your website’s footer using the Appearance section in WordPress. Navigate to Appearance > Widgets to add footer content like text, menus, or social icons. Many themes offer multiple footer widget areas (e.g., Footer 1, Footer 2). You can also assign a custom footer menu via Appearance > Menus. For advanced customization, use Appearance > Customize or the Site Editor if you’re using a block-based theme.
Create Footer Using Widgets (Appearance > Widgets)
Step-by-Step:
- Go to Dashboard > Appearance > Widgets
- You’ll see Footer Widget Areas (e.g., Footer 1, Footer 2, etc.)
- Drag and drop widgets like:
- Text
- Custom HTML
- Navigation Menu
- Image
- Customize each widget (e.g., add address, links, or copyright)
- Click Update or Save
![]()
📌 Result: The widgets will appear in your site’s footer area if the theme supports footer widgets.
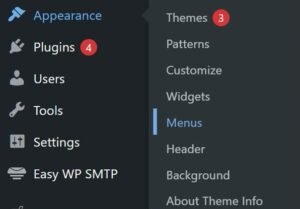
Create Footer Menu (Appearance > Menus)
Step-by-Step:
- Go to Appearance > Menus
- Click Create a New Menu → Name it “Footer Menu”
- Add Pages, Custom Links, or Categories
- Under Menu Settings, choose:
- “Display location” as Footer Menu (if your theme supports it)
-
Click Save Menu
📌 Note: The menu will appear in the footer only if your theme has a footer menu location.
Using Theme Customizer (Appearance > Customize)
Step-by-Step:
- Go to Appearance > Customize
- Navigate to Footer section (may vary depending on theme)
- You may see options like:
- Footer Layout (number of columns)
- Footer Widgets on/off
- Footer Text or Credits
-
Customize and Publish changes
![]()
📌 Note: These options depend on your theme (e.g., Astra, OceanWP, GeneratePress).
Using Page Builder or Block Themes (FSE – Full Site Editing)
If you’re using a block-based theme like Twenty Twenty-Four:
- Go to Appearance > Editor
- Click on the Footer section of the template
- Use blocks like:
- Paragraph
- Navigation
- Social Icons
-
Design and Save the template
![]()