


Contact Form 7 plugin allows you to easily add contact forms in WordPress.
Install it from Plugins → Add New, then go to Contact → Add New to create your form.
Customize form fields and copy the generated shortcode.
Paste the shortcode into any page or post to display the form.
Step 1: Install and Activate the Plugin
-
-
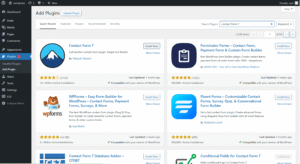
- Go to your WordPress Dashboard.
- Navigate to Plugins → Add New.
- Search for “Contact Form 7”.
- Click Install Now and then Activate.
-
Step 2: Create a New Contact Form
- Go to Contact → Contact Forms from the dashboard menu.
- Click the “Add New” button.
- Enter a title (e.g., Contact Us Form).
- By default, a basic contact form is created with:
- Click Save.
-
- Name
- Subject
- Message
- Submit Button
You provided the following Contact Form 7 code:
[submit "Submit"]
You can customize or add more fields using tags like:
Click save
Step 3: Copy the Shortcode
[contact-form-7 id="ffe0cd0" title="Contact form 1"]
After saving, you will see a shortcode like this:
Step 4: Add the Form to a Page or Post
- Go to Pages → Add New (or edit an existing page like “Contact”).
- Paste the shortcode into the content editor.
- Publish or Update the page.
Now the form will appear on the front end.
Step 5: Customize Mail Settings (Optional)
In the form editor:
-
- Go to the “Mail” tab.
- Set the To email (where submissions go), usually:
Use this in the “Mail” section:
[example@gmail.com"] - Customize the email body if needed.
- Click Save.

