The temptation when you sign up to any tool is to invite everybody immediately and work the rest out later. With time tracking that is a mistake, and an expensive one, because six settings decide what every single number in the product means.
Get them right before anybody tracks an hour and the software tells you the truth from day one. Get them wrong and you will spend a month correcting timesheets by hand, explaining to people why their attendance says absent on a public holiday, and wondering why overtime is being reported for what was obviously a normal day.
It takes about an hour. Here is the order we would do it in, why the order matters, and the mistakes that are worth avoiding at each step.
Why the order matters
Each setting depends on the ones before it. The work schedule decides what a working day is, so attendance cannot be right until it is set. Holidays remove specific dates from that schedule, so leave cannot be counted correctly until they exist. Leave types spend days from what is left. Projects decide which hours are billable. And the tracking rules decide what evidence is captured behind every hour.
Configure them out of order and the product will still work — it will just quietly produce numbers you have to correct later, and by then somebody has already seen them.
1. Organisation profile
Account Management, then Organization. Set your company name and your currency.
The currency is the one to settle first, because it is what every invoice, every rate and every plan price is shown in. Changing it later does not retroactively re-price anything you have already billed, so pick it once and leave it alone.
This page also holds your licence and seat count, and the audit log — the record of who changed what, and when. You will be glad of it the first time a setting moves and nobody remembers doing it. Nothing in the product can edit the audit log, which is the entire point of having one.
Working days live here too
The organisation profile carries the company-wide working days. That is the coarse version; the Work Schedules page is where the detail lives, and it is the next step.
2. The work schedule
Account Management, then Work Schedules. Pick the days your company works and the expected hours in a normal day. This is the foundation everything else measures against.
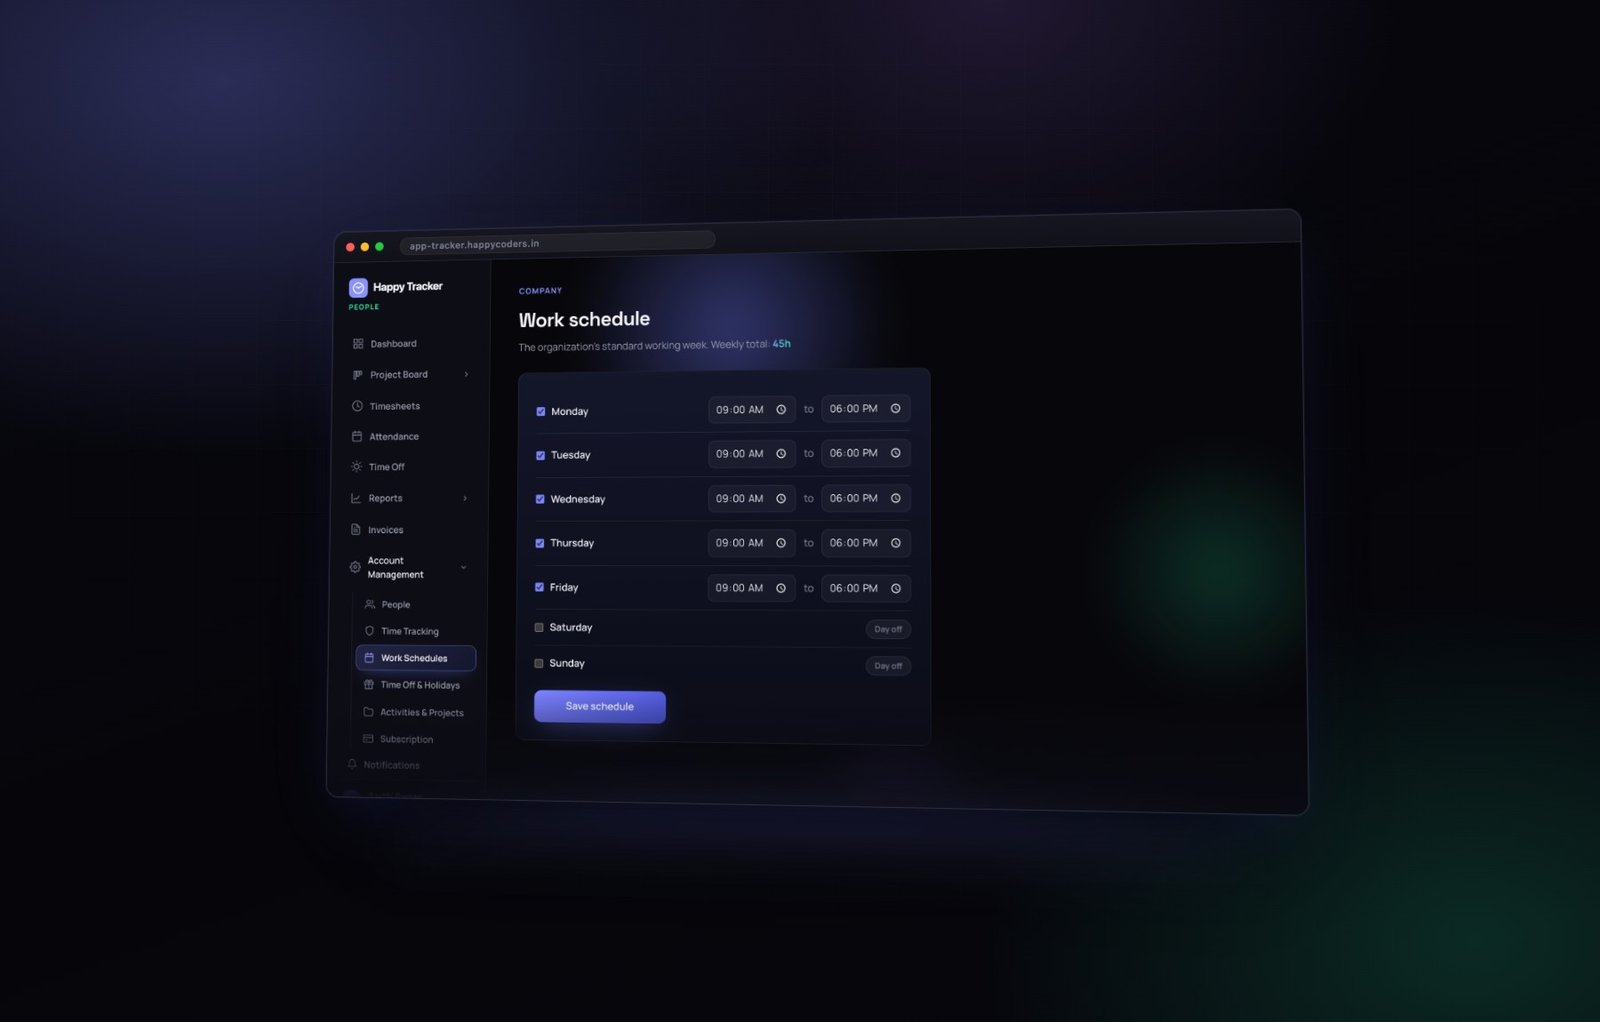
- Attendance uses it to decide which days somebody could have been absent. A Sunday is not an absence; a Tuesday might be.
- Overtime is measured against the expected hours in a day, so this number directly affects payroll.
- Leave counts only working days, so a request spanning a weekend does not eat somebody’s balance.
- Work schedule restrictions, if you choose to use them, allow clocking in only around these hours.
Set the expected hours honestly. If you enter eight when your team genuinely works nine, every overtime figure in the product will be wrong from that day onwards — and wrong in the direction that costs you money and irritates the people working the extra hour.
When to use a per-person schedule
There is a per-person schedule for anybody who genuinely works different days — a part-timer, somebody on a different shift, a contractor on a four-day week. Use it sparingly. For most companies the single company schedule is the whole answer, and a dozen individual exceptions is a sign the company schedule is set wrongly.
3. The holiday calendar
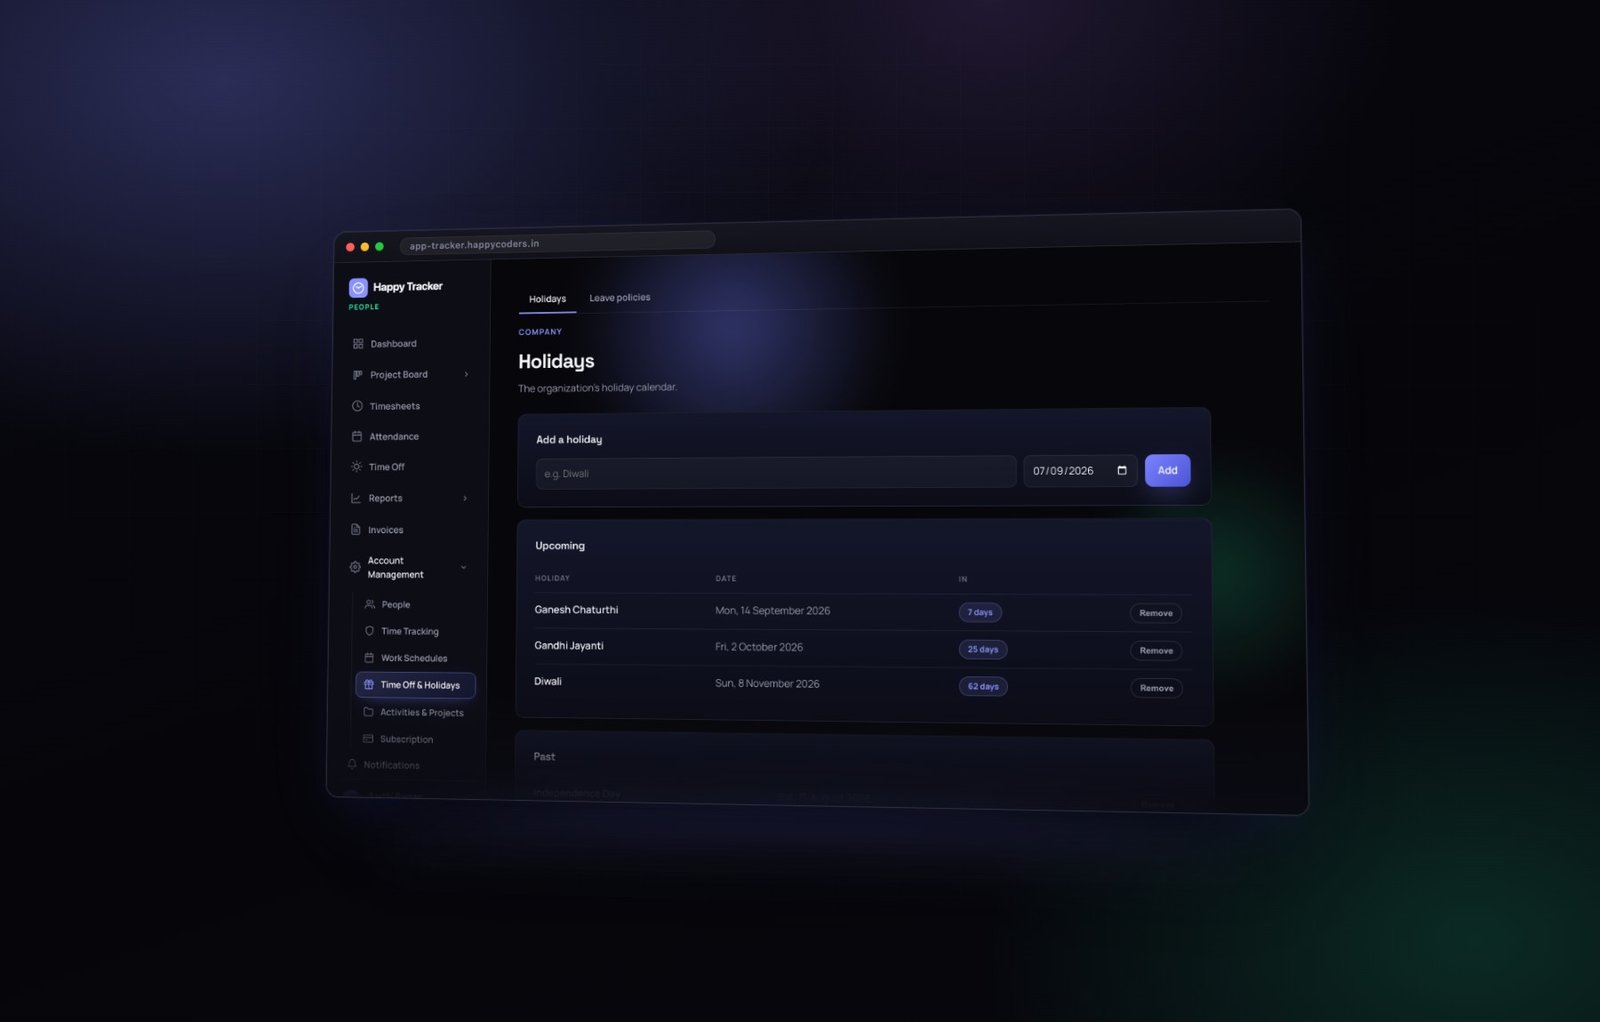
Time Off and Holidays, then the Holidays tab. Add every day the whole company is off, for the year, in one sitting. It takes ten minutes and several other screens quietly depend on it.
A holiday is not just a label
- On attendance, a holiday becomes a non-working day, so nobody shows as absent for a day the office was shut.
- Inside a leave request, a holiday is not counted against the person’s balance.
- On the dashboard, the next few appear under upcoming holidays, which is more useful when planning a deadline than it sounds.
The case that catches everybody out
Somebody takes Monday to Friday off. The Wednesday in the middle is a company holiday. They should spend four days of leave, not five, because the Wednesday was never theirs to spend.
Happy Tracker gets that right automatically — but only if it knows about the Wednesday. If your holiday list lives in a spreadsheet, somebody does that subtraction by hand twelve times a year and occasionally gets it wrong. Ten minutes now removes an argument later.
The list splits into upcoming and past, and each row can be removed. Leave the past ones alone — removing a holiday that has already been counted does not rewrite the attendance that was calculated with it, so all you achieve is a mismatch between the calendar and the record.
4. Leave types
The Leave policies tab, in the same place. Each type has a name, a yearly allowance in days, and a colour.
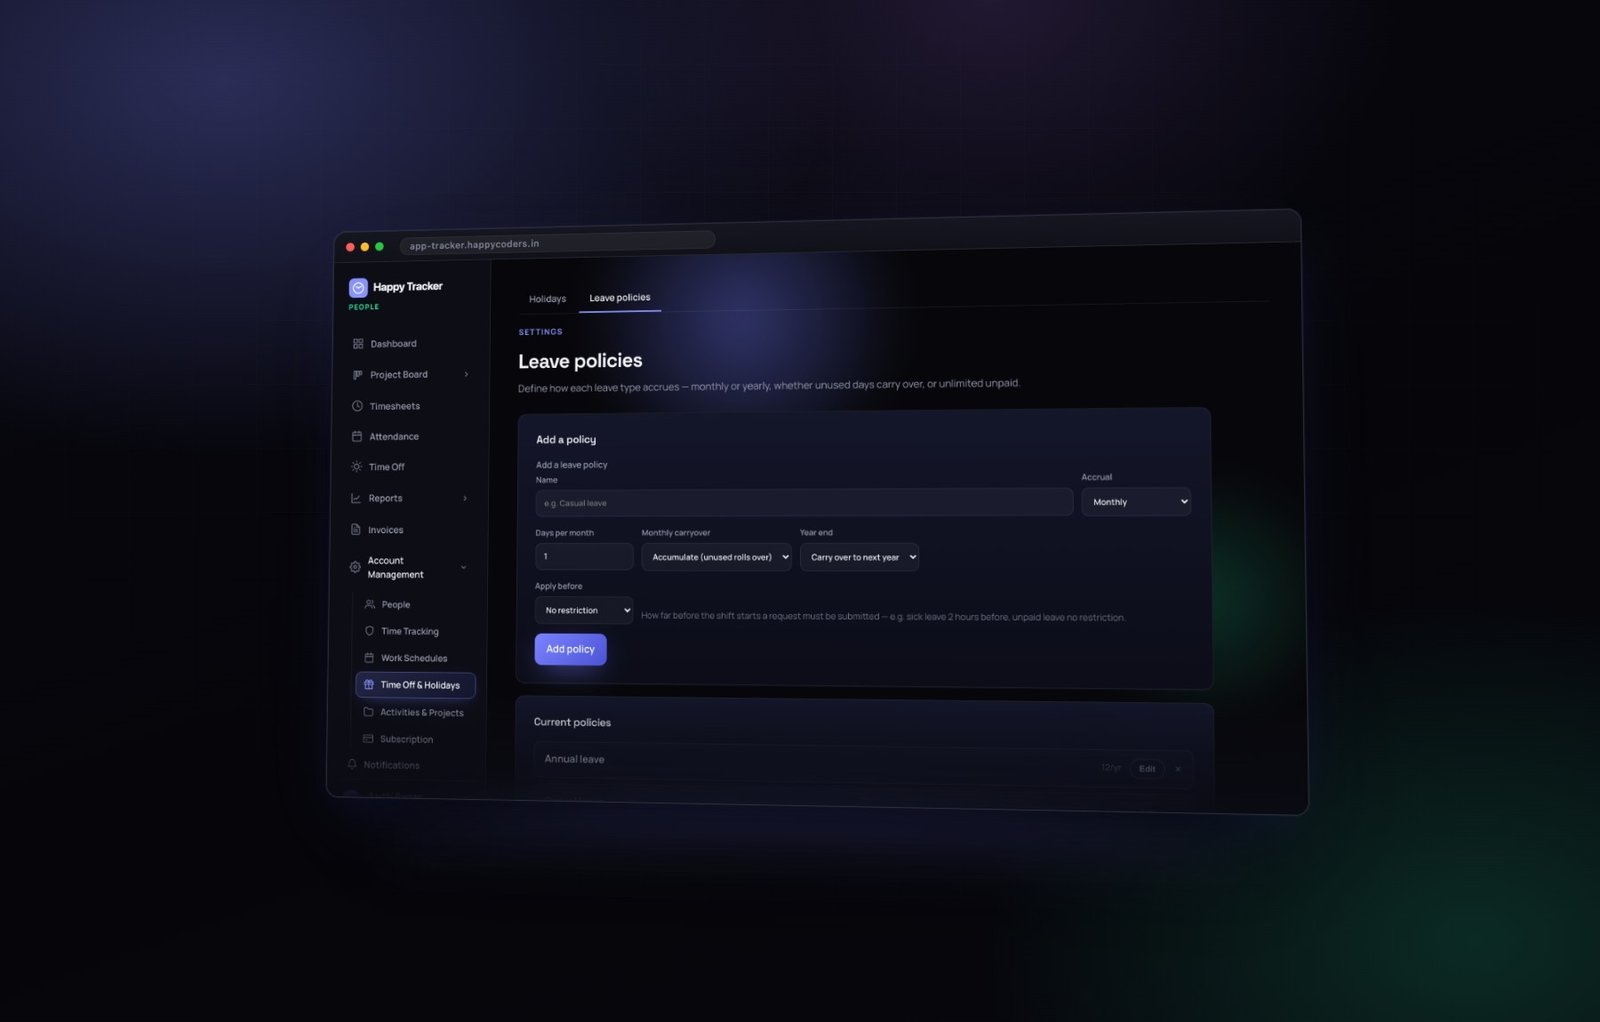
Annual, casual and sick are the usual three. Add whatever else you genuinely offer — bereavement, marriage, unpaid, compensatory off. Save a type and it appears in everybody’s Apply for leave dropdown immediately, with no further step.
Each type is counted on its own
Somebody who has used all their casual leave still has their annual leave, and the balances table shows each type in its own column with a total taken. Set the allowances to match what your offer letter actually says, because this is the number your team will quote back at you in March.
Changing an allowance later
You can change one at any time and it applies from that moment onwards. Raising annual leave from twelve to fifteen gives everybody three more days from today.
It does not retrospectively rewrite requests that were already approved, which is exactly what you want. Last year’s approvals should not move because this year’s policy changed, and a product that silently recalculated history would be doing you no favours at all.
Deleting a leave type never throws away the requests made against it. The type is archived: it stops appearing for new requests, and every past request keeps its history on that person’s record. Leave records are precisely the kind of thing you cannot afford to lose, and this behaviour is deliberate rather than accidental.
5. Clients and projects
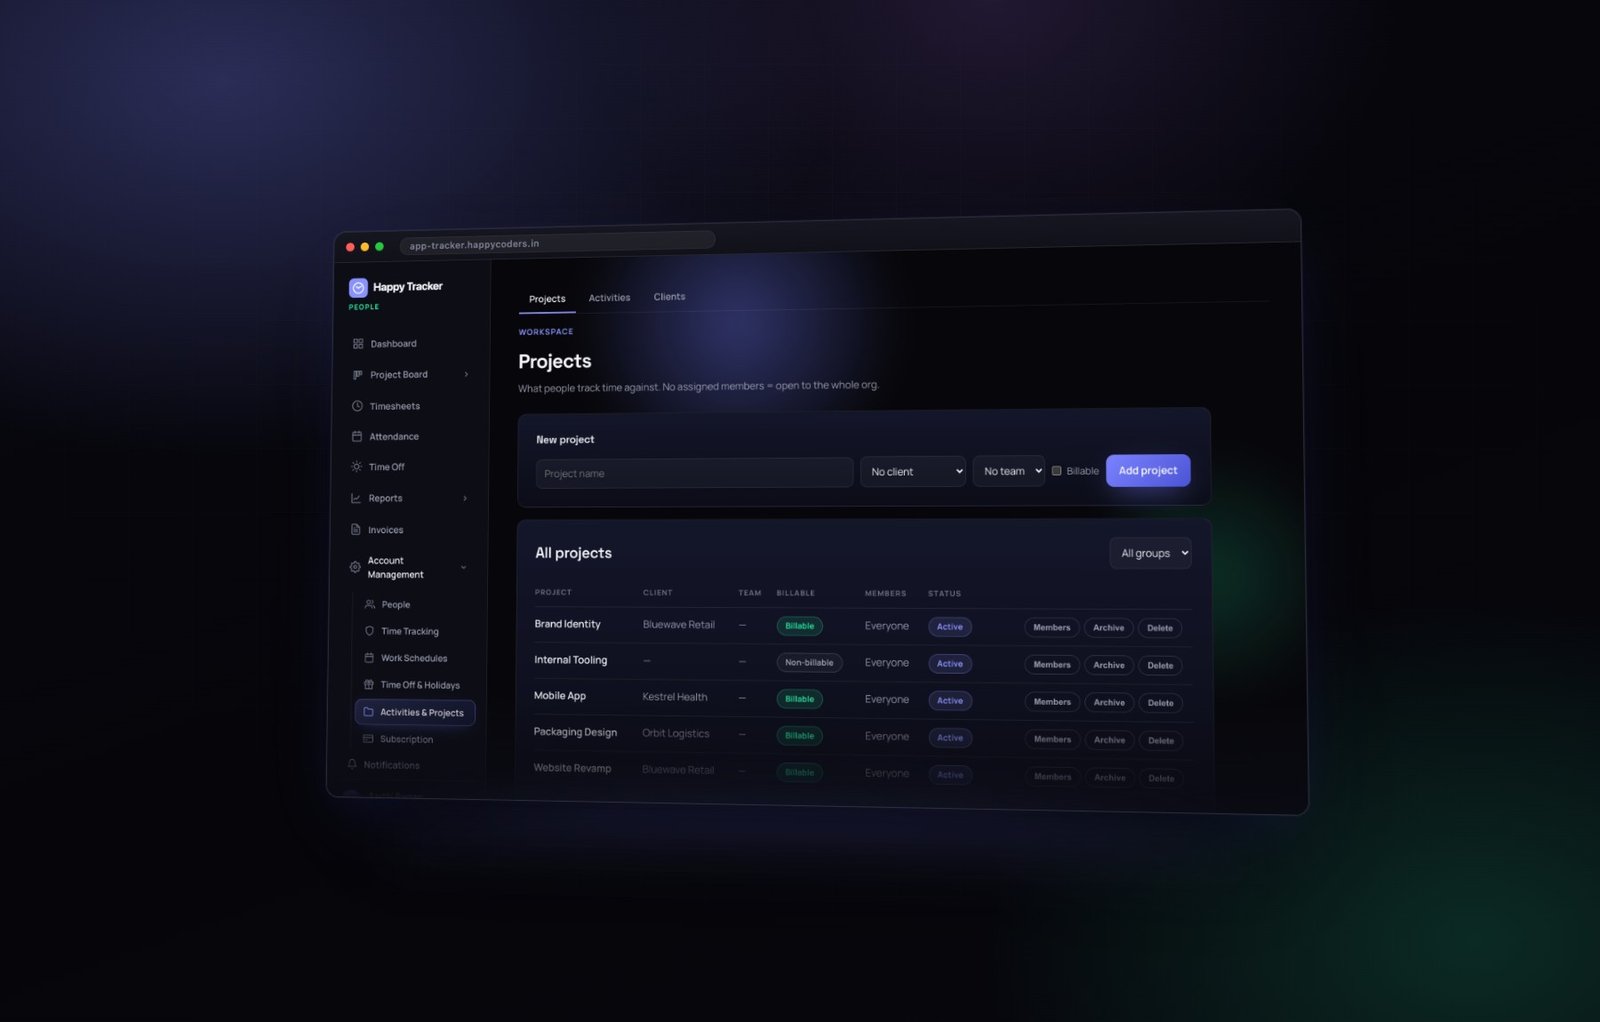
Activities and Projects. Create your clients first, then the projects underneath them.
The billable flag
Mark each project billable or not as you create it. That single flag reaches further than anything else on the page: it decides whether hours on the project appear in the billable column in your reports, and whether they can ever be pulled into an invoice.
Mark internal work as non-billable honestly. It is not a failure — it is how you find out what your overhead actually costs. Worked hours minus billable hours is your internal load, and if that number grows quietly you want to see it in a report rather than in the bank balance six months later.
Members on a project
The members list controls who can pick that project when they clock in. Keeping it tight means a shorter dropdown for everybody and far fewer hours booked to the wrong place — which is the single most common cause of a timesheet nobody trusts.
Archive rather than delete
A finished project gets archived. It disappears from the clock-in dropdown, and every hour ever booked to it stays in your reports and invoices. Delete exists only for a project created by mistake with no time on it.
6. The tracking rules
Account Management, then Time Tracking. This is the page that changes what the desktop app does on everybody’s machine, so it deserves five unhurried minutes rather than a quick skim.
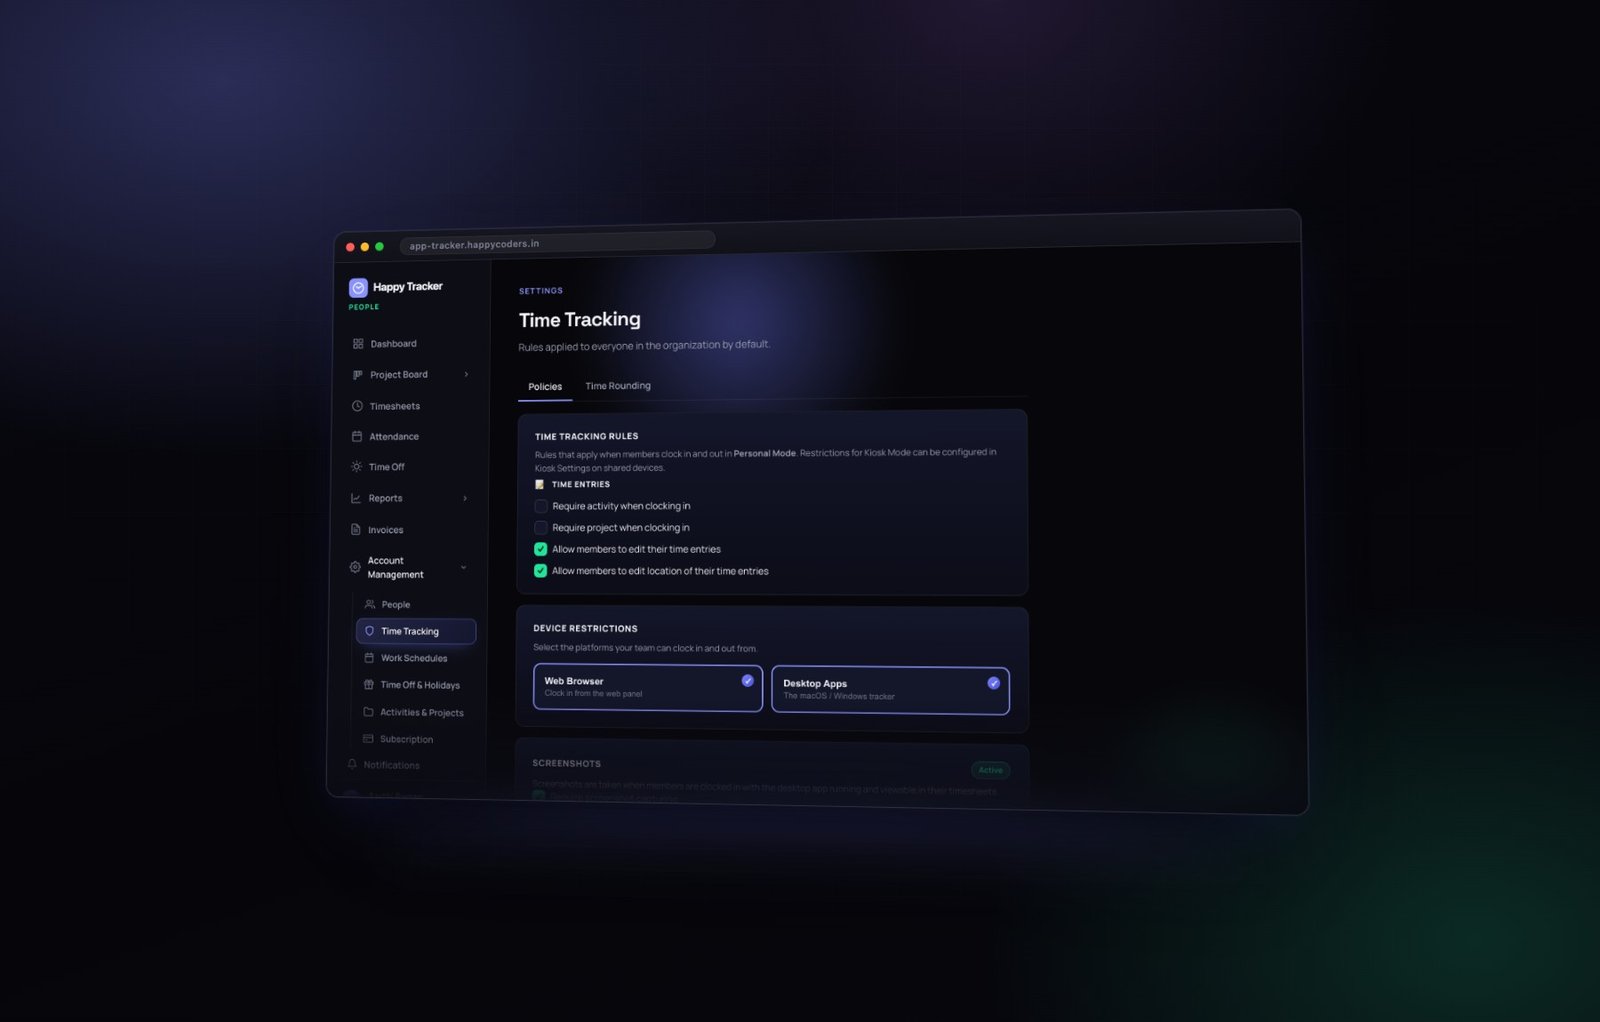
A reasonable starting point for most teams:
- Screenshots on, at a longer interval rather than the shortest available, with on-device blur enabled.
- Device restrictions left as both web and desktop to begin with. Tighten once the desktop app is actually installed everywhere, not before.
- Device lock on, so one account runs the tracker on one machine at a time.
- Reminders on, so people are nudged if they forget to start the timer.
- Automatic clock out on, so a Friday evening mistake does not become a weekend of tracked time.
- Idle auto-off around ten minutes.
- Time rounding off, unless a client contract specifically requires it.
Why start loose
Starting loose and tightening is far easier than starting tight and explaining yourself. A capture every thirty seconds does not tell you more than one every ten minutes — it tells you the same thing at twenty times the storage cost, with a team who feel watched rather than trusted.
Nothing here has to be permanent. The desktop apps pick up new rules on their next sync, without anybody reinstalling anything, so you can adjust as you learn what your team actually needs.
Nothing on this page applies until you press Save policies at the bottom. It is easy to change six settings, navigate away, and wonder later why nothing happened.
7. Now invite your team
With all of that in place, invite people — and only now.
Give each person the right role at invite time. An employee sees their own work. A manager adds their team’s timesheets, reports and approvals. An admin adds all of Account Management. The owner adds billing and the plan, and cannot be removed. Most companies want exactly one owner and one or two admins.
They receive a link, set their own password, and they are in. You never create or know somebody else’s password, which is deliberate — and which is why “can you just tell me their password” is a request the product cannot fulfil for anybody, including you.
What they arrive to
A product that already knows your working week, your holidays, your leave policy, your projects and your rules. Their first tracked hour is correct rather than something somebody fixes a fortnight later, and their first impression is of a tool that was set up thoughtfully rather than switched on in a hurry.
Tell them what is being recorded
Before the first day, not after. Say four things plainly: what is captured, when it is captured, who can see it, and what it will and will not be used for. Then let people ask questions before it starts.
The single most reassuring fact is that recording happens only while somebody is clocked in — not in the evening, not at the weekend, not when the app is closed. Say that early and most of the anxiety goes away.
8. Get the desktop app onto their machines
The last step, and the one most often left half done. Browser clock-in records an hour; the desktop tracker records what the hour contained. Send everybody to App Download and make sure it is genuinely installed before you rely on any activity report.
On a Mac it asks for Screen Recording and Accessibility on first run. Both matter — without Accessibility the timer runs but almost nothing is recorded behind it. If somebody shows a full day of hours and no activity at all, that permission is the first thing to check.
Once it is on every machine, that is the moment to go back to Time Tracking and decide whether to require the desktop app for clocking in — with a per-person override for anybody who genuinely needs the browser.
Common mistakes worth avoiding
- Inviting people first. Everything above becomes retrospective correction rather than setup.
- Guessing the expected hours. It silently distorts every overtime figure.
- Skipping holidays because “we all know them”. The software does not, and it is the software doing the arithmetic.
- Making every project billable by default. You lose the one number that tells you what your overhead costs.
- Turning screenshots to the shortest interval on day one. It buys nothing and costs trust.
- Not telling the team. The fastest way to turn a useful tool into a political problem.
A checklist you can work through
- Organisation name and currency.
- Work schedule: working days and expected hours.
- Holidays for the year, in one sitting.
- Leave types and their allowances.
- Clients, then projects, each marked billable or internal.
- Tracking rules — then press Save policies.
- Invite people with the right role, after telling them what is recorded.
- Install the desktop app everywhere, then tighten the device rules.
Questions that come up in the first week
Somebody shows hours but no activity at all
Almost always a missing permission on their machine. On a Mac, Accessibility is how the tracker notices input; without it the timer runs and records nothing behind it. On Ubuntu, the screen-share prompt may never have been answered. Check the machine before you check the person.
Attendance says absent on a day somebody worked
Either they clocked in from the browser and the day has no tracked time attached, or the day is outside the work schedule you set. Both are settings problems rather than data problems, and both are fixed on the pages above.
The leave balance looks wrong
Check three things in order: whether the request was approved or is still pending — pending requests never move a balance; whether a company holiday fell inside the range; and whether the allowance on that leave type matches what you intended.
Overtime is being reported for a normal day
The expected hours in the work schedule are set lower than the day your team actually works. This is the most common misconfiguration of all, and it is a one-field fix.
An invoice came out lower than expected
Check the billable flag on the project first. Then check whether the weeks in that period were approved. Then check whether people were tracking against the right project at all — the productivity report by task will tell you in seconds.
Somebody cannot see a report you think they should
Use the Switch button on the People page to sign in as them and look. It takes ten seconds and removes all the guessing. An amber banner keeps you aware you are doing it, and the switch is logged.
What to do in week two
Once the workspace is set up and people are tracking, three habits decide whether the data stays trustworthy.
- Approve timesheets weekly, on a fixed day. Monday morning for the week just finished. Everybody still remembers what happened, so corrections take a sentence rather than an investigation.
- Check the activity report once, early. Anybody showing hours with no activity has a permission problem worth fixing in week one rather than month three.
- Review the billable share at the end of the first month. Worked hours minus billable hours is your internal load. Whatever that number is, it is worth knowing before it becomes a habit.
And resist tightening the tracking rules in the first fortnight. Let people get used to the timer before you add restrictions to it. Almost every team that tightens early ends up loosening again, having spent the goodwill for nothing.
All of this works on the free plan, for up to five users, with no card required. Start free and set it up properly before anybody depends on the numbers.