Most people who want to start a YouTube channel spend three weeks choosing equipment and never record anything. That is the actual failure mode. It is not the microphone, it is not the camera, and it is certainly not the editing software — it is that the first video never gets made, because making it feels like it needs a purchase first.
It does not. A Mac from the last six or seven years, a free screen recorder, and a quiet half hour will produce a video that is good enough to publish. Everything below is about spending that half hour well, so the thing actually goes up.
What you actually need
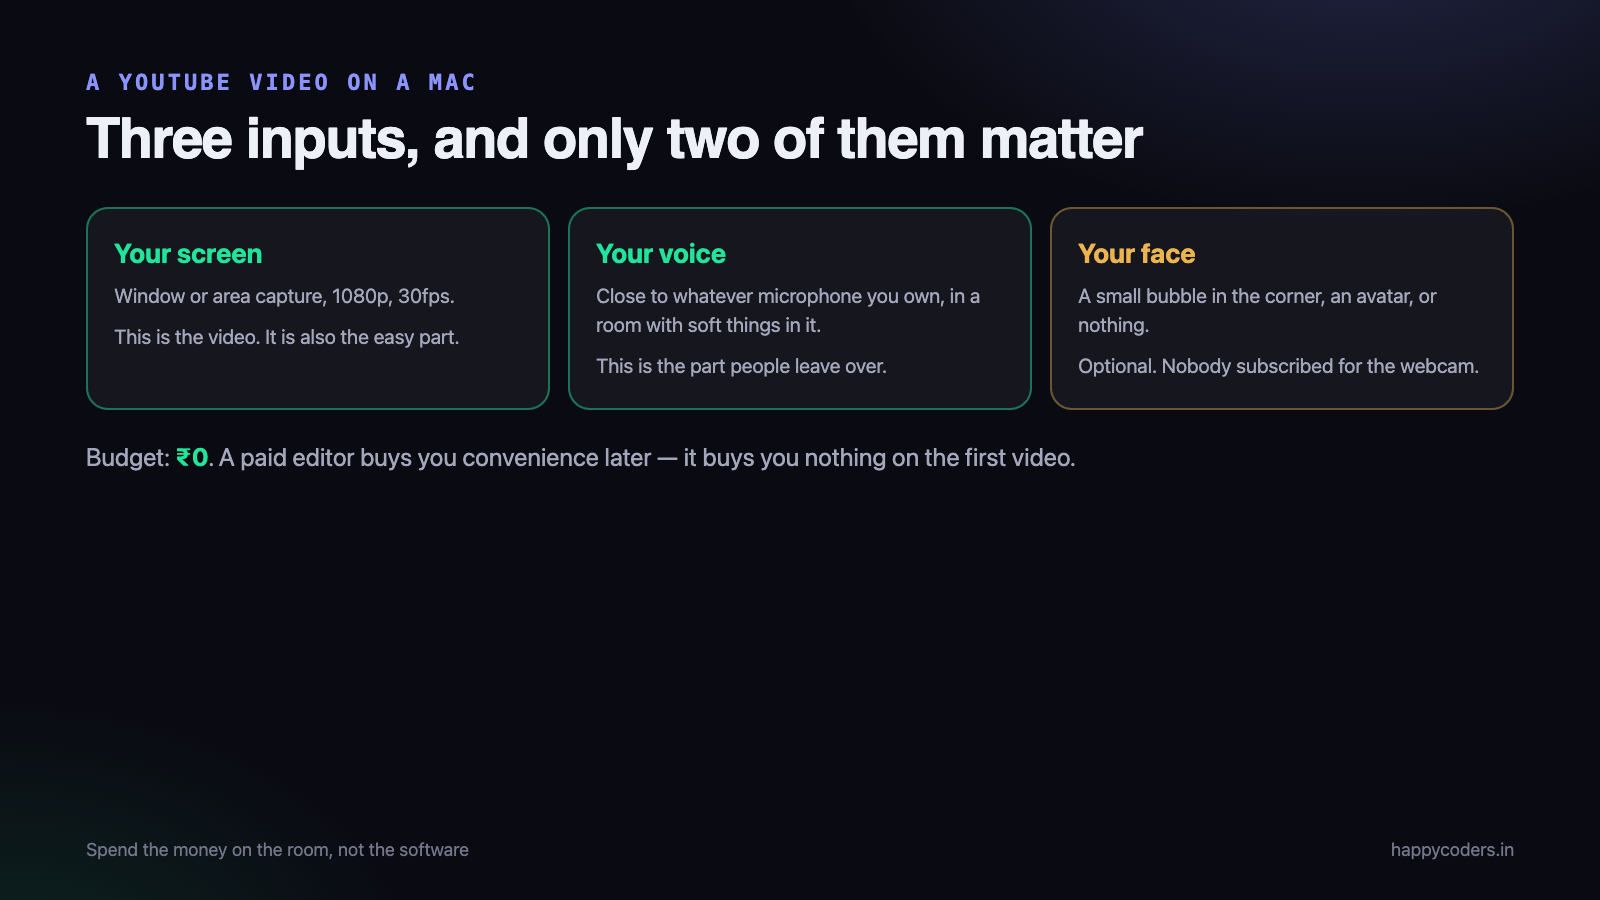
There are exactly three inputs in a screen-based YouTube video, and they are not equally important.
The screen
This is your video track. A free recorder that can capture the whole screen, a single window, or a rectangular area is all you need. Window capture is the one you will use most: it keeps your desktop, your other tabs and your notifications out of the file, and it keeps the text large in the frame.
Area capture matters more than people expect. If your video is about one panel of an application — a settings page, a chart, a code editor — capturing a 1280×720 rectangle around that panel gives the viewer a frame that is entirely useful, rather than a full screen where the interesting part is a quarter of the picture.
The microphone
Any microphone. The one built into the Mac, the one on your earphones, the ₹1,500 USB one you already bought. The difference between these three is real but small. The difference between any of them held close in a soft room and any of them across a tiled hall is enormous.
If you have nothing at all, wired earphones with an inline microphone are better than the laptop for one reason: the microphone is near your mouth and far from the fan. Bluetooth earbuds are the exception — many of them drop the recording quality sharply the moment the microphone is switched on. Test yours before you rely on it.
The camera, which is optional
You do not need to be on camera to publish a screen video. A small camera bubble in a corner helps when you are persuading somebody — a review, an opinion, an introduction. It helps almost not at all in a tutorial, where it covers part of the screen and adds nothing. If you want the sense of a person without putting your face in the file, an avatar in the bubble does the job.
Order of attention for a first video: audio, framing, script, then camera. Almost everybody does that list backwards and wonders why the result feels amateur.
Pick a resolution YouTube is kind to
YouTube re-encodes everything you upload. You are not choosing what viewers see directly — you are choosing what the re-encoder has to work with. That changes the advice slightly from normal screen recording.
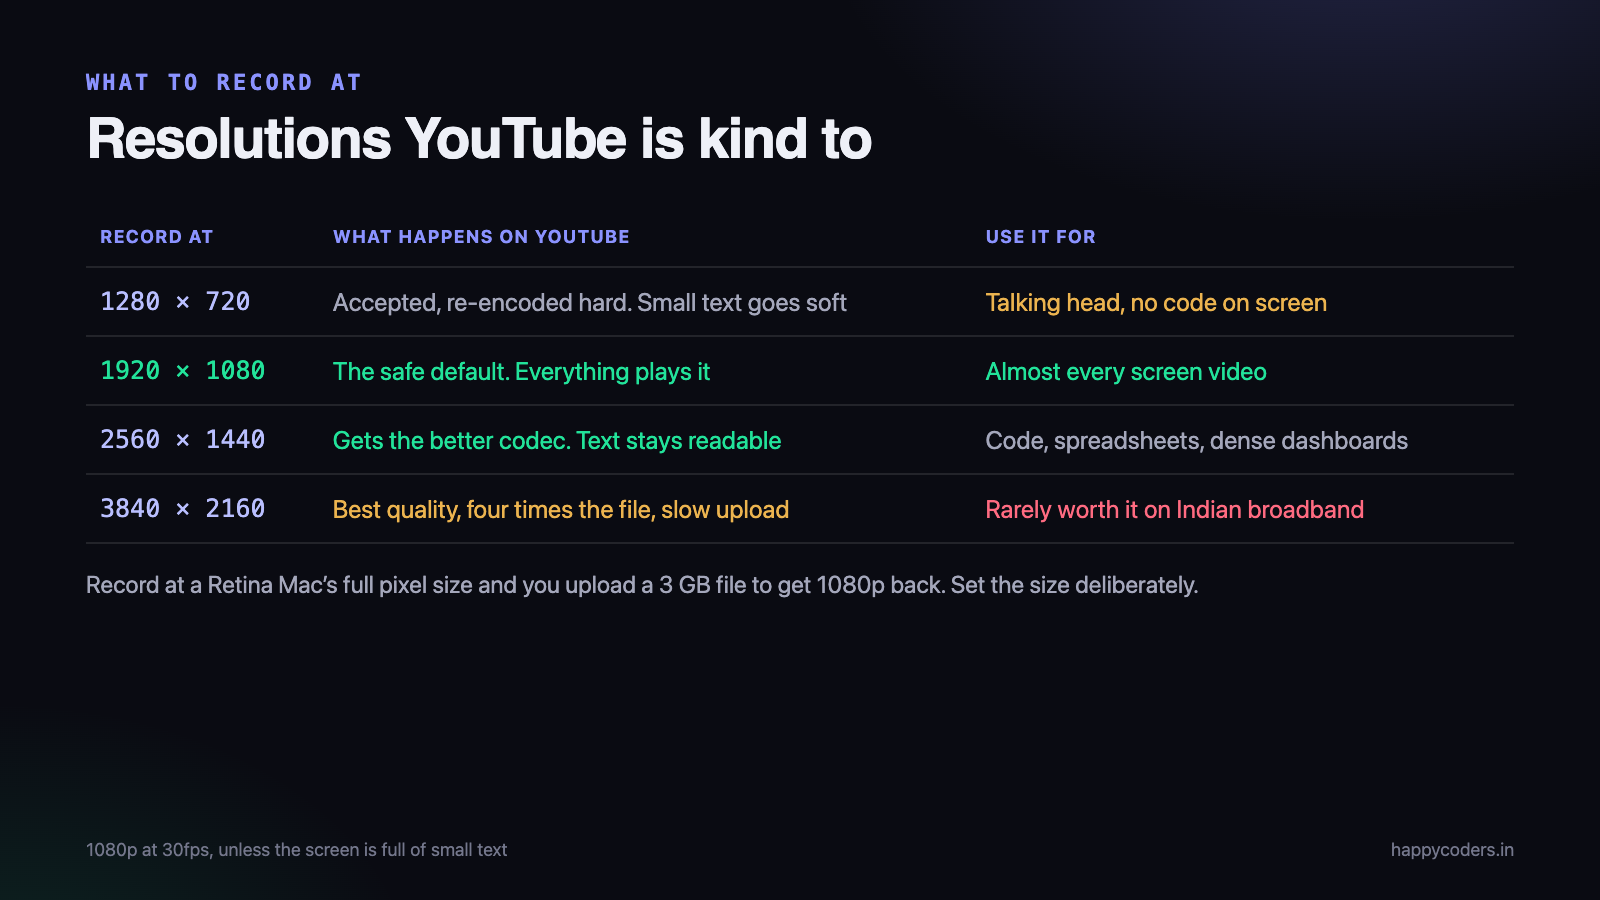
1920×1080 is the safe answer. It plays everywhere, it uploads on an ordinary Indian broadband line in a few minutes, and it is the resolution YouTube’s pipeline is most thoroughly tuned for.
Record at 2560×1440 only when the screen is genuinely dense — code, spreadsheets, a dashboard with small labels. Higher-resolution uploads get a better codec on YouTube, which shows up as cleaner small text after compression. That is a real gain for a coding tutorial and no gain at all for a talking head.
The Retina trap
A 14-inch MacBook Pro has a 3024×1964 panel. If your recorder captures at full pixel size, a fifteen-minute video can land at two or three gigabytes, take an hour to upload, and come back as 1080p anyway. Record at the logical size — what the screen looks like, not what it measures — and the file is roughly a quarter the size with no visible difference in a browser window. If your recorder offers a 1× or “non-Retina” option, that is the one.
We wrote about this in more detail in how to reduce screen recording file size, because it is the single setting that catches most people out.
Frame rate
30fps for anything where a person is talking over a screen. 60fps doubles the file, doubles the upload and shows up only when there is real motion — gameplay, animation, fast scrolling. For a tutorial or a review it is a waste of bandwidth.
Framing beats camera quality, every time
Framing is where the amateur look actually comes from, and it costs nothing to fix.
- Fill the frame with the thing you are talking about. If the viewer has to squint to find your cursor, the shot is wrong. Resize the window before you record; do not capture a 27-inch display and hope.
- Turn the interface font up. Editors, terminals and browsers all support it. Most of your audience is on a phone, and 12px text does not survive being compressed and then shrunk to a 6-inch screen.
- Use a light theme if the video is instructional. Dark themes are lovely to work in and go mushy through YouTube’s encoder. Light backgrounds with dark text survive compression better.
- Move the cursor deliberately. Pause before each click. A cursor that darts is genuinely hard to follow at 30fps after compression.
- Keep the camera bubble small and in a corner that is empty. Bottom right, over a margin, never over the content.
If you are on camera at all, one lamp or a window in front of you fixes more than a better camera would. A window behind you turns you into a silhouette, and no amount of sensor quality rescues that.
Audio is what people actually leave over
Viewers forgive a soft picture. They do not forgive sound they have to strain against. Watch your own analytics later and you will find that the videos people abandon in the first thirty seconds are usually the ones recorded in a bad room.
Three things decide your audio, in this order:
- Distance. Get the microphone 15 to 20 cm from your mouth, slightly off to one side so your breath does not hit it directly. This is free and it is the biggest single improvement available to you.
- The room. Hard surfaces bounce sound. A room with a bed, curtains, a sofa or a cupboard full of clothes sounds dramatically better than an empty tiled room, whatever microphone you are holding.
- Levels. Record ten seconds, play it back at normal volume, and check that your voice sits comfortably without clipping at the loud parts. Do this once per setup, not once per video.
Background noise in an Indian home or office
Advice written for a studio in another country is of limited use here. These are the noises that actually turn up in recordings made in Tirunelveli, Chennai or a shared office in Coimbatore, and what works against each.
The ceiling fan
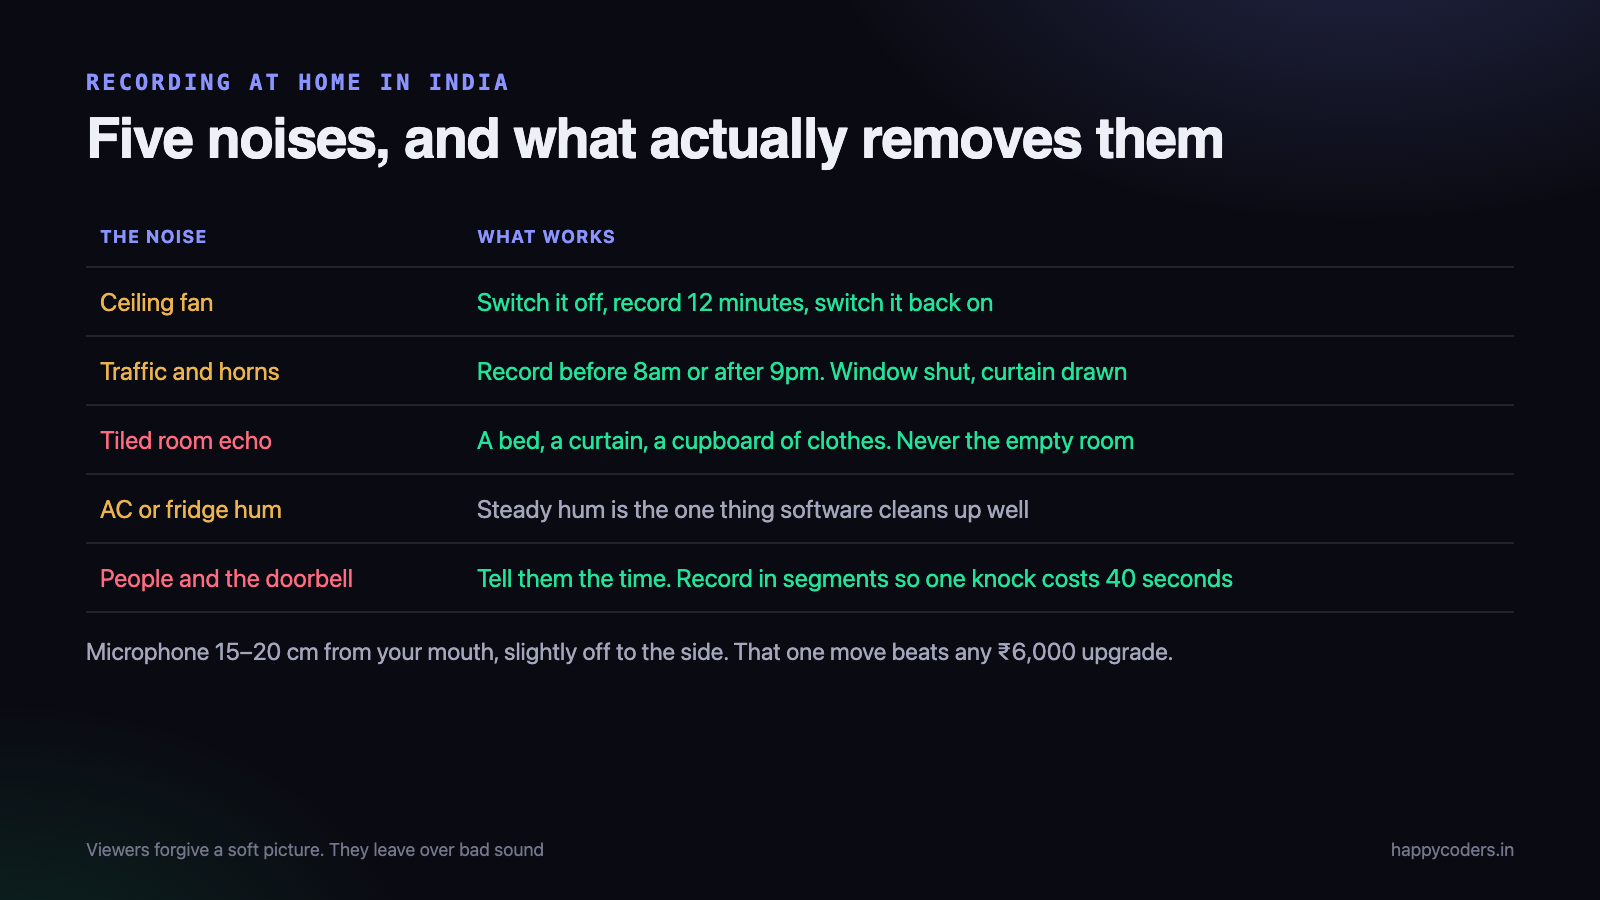
The most common ruined recording in India. A fan adds a low rumble and a rhythmic beat that noise reduction cannot remove cleanly, because it is not steady. Switch it off, record your twelve minutes, switch it back on. If the room is unbearable, record in segments of four or five minutes with the fan on between takes.
Traffic, horns and the street
Shut the window and draw a heavy curtain; the curtain does more than the glass. Better still, choose the hour. Before 8am and after 9pm are quiet in most Indian neighbourhoods, and nothing else you do will match the effect of recording at the right time.
Echo from tiled floors and bare walls
Almost every home in India has tiled floors, which is exactly what echo needs. Record in the bedroom, not the hall. If you can hear a ring when you clap once, the microphone will hear it too. A bedsheet hung behind you, or simply sitting closer to a cupboard of clothes, takes most of it out.
AC units, fridges and computer fans
Steady hums are the easy case — consistent noise is the one thing free audio cleanup handles well. Still, if the compressor is going to cut in and out halfway through, switch it off and accept a warm room for ten minutes.
People, doorbells and the pressure cooker
Tell the household when you are recording, and record in segments so an interruption costs you forty seconds rather than the whole take. In a shared office, book the meeting room for half an hour rather than trying to be quiet at your desk with a team around you.
Record thirty seconds of the room in silence before your first real take and listen to it on headphones. You will hear a fan, a fridge or a hum you had stopped noticing years ago. That is what the video will sound like underneath your voice.
Record in segments, not in one heroic take
This is the habit that separates people who publish from people who have four unfinished attempts in a folder.
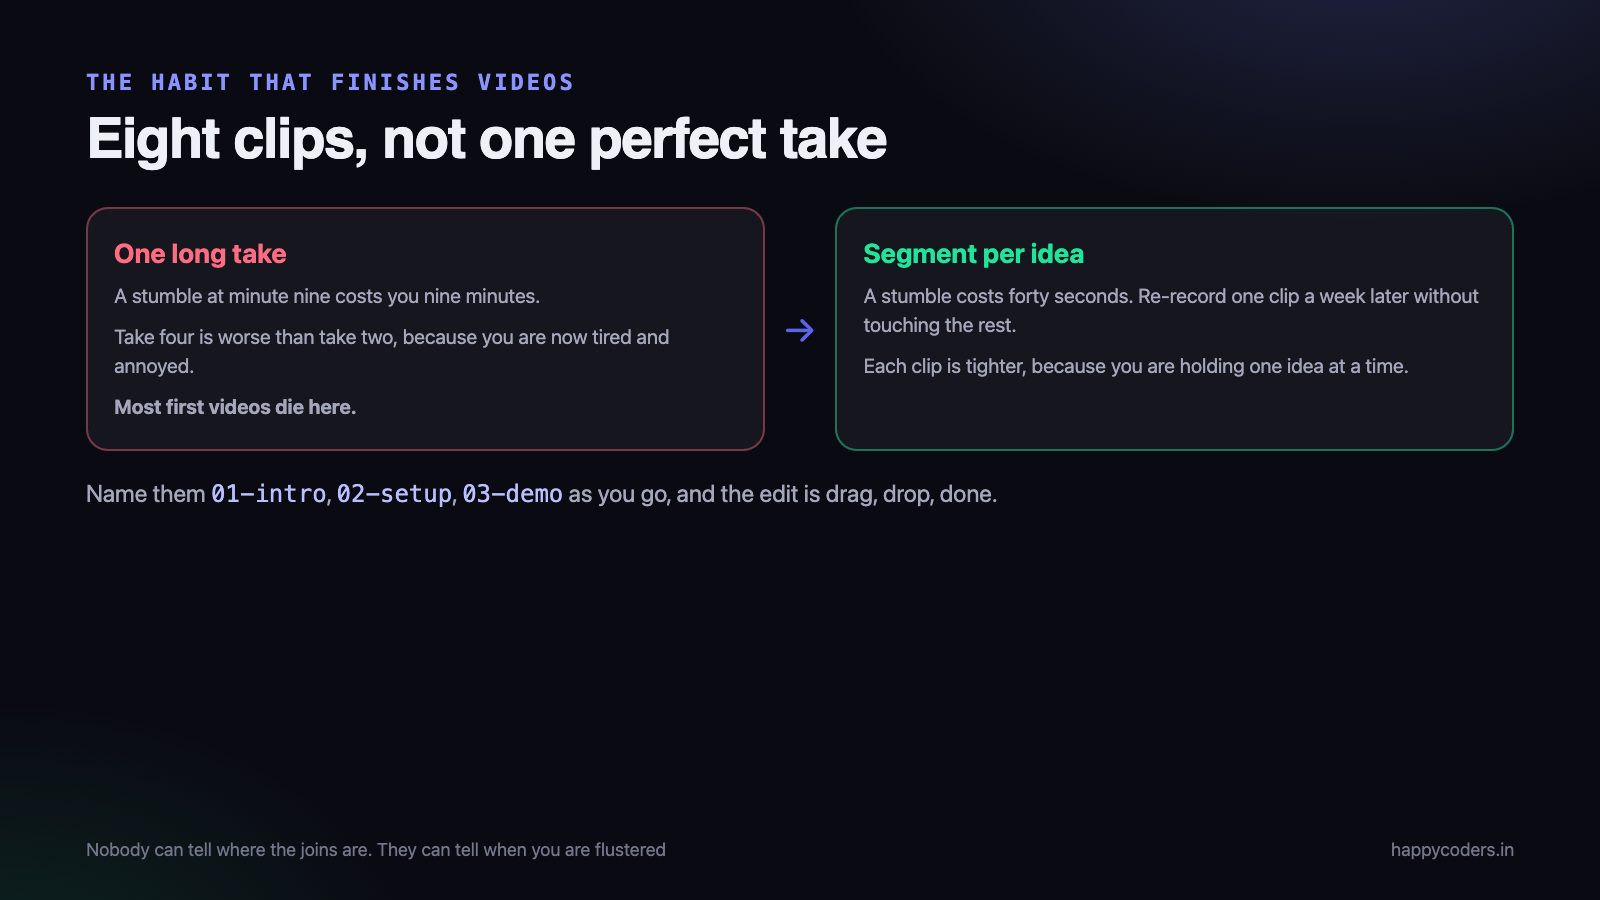
Break the video into the ideas it contains — the hook, the setup, the two or three steps, the result, the close — and record each one as its own file. Name them as you go: 01-intro, 02-setup, 03-demo, 04-close. The edit afterwards is dragging five files into order.
The effect on quality is larger than it sounds. Each clip is tighter, because you are holding one idea in your head rather than ten. If one section is weak, you re-record that section a week later without touching the rest. And nobody watching can tell where the joins are — but everybody can tell when the speaker is flustered because this is their fourth attempt at minute nine.
It also gives you something afterwards. The good forty-second clip is a Short, a WhatsApp reply to somebody who asked, an Instagram post. That material already exists and costs nothing more to use.
Say something in the first fifteen seconds
YouTube decides very quickly whether to keep showing your video to people, and the signal it uses is whether viewers stay. The first fifteen seconds carry more weight than the rest of the video combined.
- Do not open with your name and your channel. Nobody has a reason to care yet. Get to it in the first sentence and introduce yourself later, briefly, or not at all.
- Open with the problem in the viewer’s words. “If your invoice numbers reset every April and you do not know why, this is the setting.”
- Show the finished result early. Then go back and walk through how you got there. The viewer needs to see where you are going, or they will not follow.
- Skip the animated intro sequence. Five seconds of logo animation is five seconds of people leaving.
It is worth writing those first two sentences out word for word and reading them. Everything after that can be spoken from a list of points, but the opening is worth scripting because it is the part most people hear.
Editing, for people who do not want to edit
You can publish an unedited segment-recorded video and it will be fine. If you want to do a little more, there are exactly three edits worth making, and iMovie — free on every Mac — handles all of them.
- Trim the ends. The two seconds where you reach for the stop button, and the “okay, so…” at the start.
- Cut the dead time. The four seconds a page takes to load, the pause where you are looking for a file. Twenty per cent of most recordings is nothing happening.
- Even out the volume. If one segment was recorded closer than another, match them. A section that is noticeably quieter reads as careless.
That is the whole list. Transitions, background music and captions burned into the frame make videos worse more often than better. YouTube’s own automatic subtitles are good enough to start with, and you can correct them in the studio afterwards for free.
Uploading without undoing your work
A few upload details matter more than any of the recording settings.
- Upload the original file, not a compressed copy. Shrinking a video before uploading it to YouTube makes the final quality worse, because YouTube compresses it again on top of your compression.
- Let it finish processing. The high-resolution version appears some minutes after the upload completes. If you watch your own video immediately it will look terrible, and it is not your recording’s fault.
- Write a title somebody would search for. Not “My first video” — the question you are answering, in the words a person would type.
- Put the important sentence in the first line of the description. That line is what appears in search results and in WhatsApp previews.
- Upload a thumbnail with four or five large words on it. A frame grab from the video almost never works, because screen content is unreadable at thumbnail size.
A realistic first-video checklist
Print this, or keep it open on a phone. It is a list for the day you actually record, not a philosophy.
- Decide the one question the video answers. Write it as a sentence. If it needs the word “and”, that is two videos.
- Write the first two sentences word for word, and a list of five points for the rest. Not a full script — read scripts sound read.
- Set up the screen. Realistic data, no personal information visible, fonts up, other windows closed, Do Not Disturb on, bookmarks bar hidden.
- Fix the capture. Window or area, 1080p at the logical size, 30fps.
- Fan off, window shut, phone on silent, door shut. Tell the household how long you need.
- Record ten seconds and play it back. Check the voice level, check the system audio if the video has any, check the frame.
- Walk the click path once without recording. The take you publish should be your second run.
- Record segment by segment, naming files as you go. Stop and restart rather than pushing through a bad take.
- Trim, join, check the audio levels match, and watch it once at normal volume as though a stranger sent it to you.
- Upload the original, write a real title, make a thumbnail with words on it, and publish. Do not wait until it is perfect.
What most first videos get wrong
Having watched a fair number of first attempts from people we work with, the same four things come up.
- Too long. A seven-minute video that answers one question outperforms a twenty-minute one that covers a topic. People finish short videos and then watch another.
- No point in the first thirty seconds. Usually because the recording started before the thinking did.
- Unreadable on a phone. Test it: watch on your own phone at arm’s length before publishing.
- Never published. By far the most common. The fourth take is not better than the second; it is just later.
On Monday morning
Do not buy anything. Block forty minutes, pick one question you can answer in seven minutes, and get through the checklist above once from top to bottom.
Record it in segments, trim the ends, upload the original file and publish it unlisted if you are nervous. Send the link to three people whose opinion you trust and ask one question only: was there a moment where you would have stopped watching? That answer is worth more than any equipment you could buy this month.
Then record the second one on Wednesday. The gap between a first video and a fifth video is much larger than the gap between a laptop microphone and a good one.
HappyRec is a free screen recorder for macOS with window and area capture, system audio alongside your microphone, and a camera bubble or avatar when you want a face in the corner — which is everything this article asks for, at no cost.