Most people record their screen for the first time because somebody asked them to. A colleague wants to see the bug. A client wants to see the feature. A student wants the walkthrough you just explained on a call.
And most first recordings have something wrong with them — no sound, the wrong screen, a notification popping up halfway through. None of that is your fault; it is the tool not telling you what it needed. Here is the whole thing, in order, so that your first recording is one you can actually send.
Before you press record
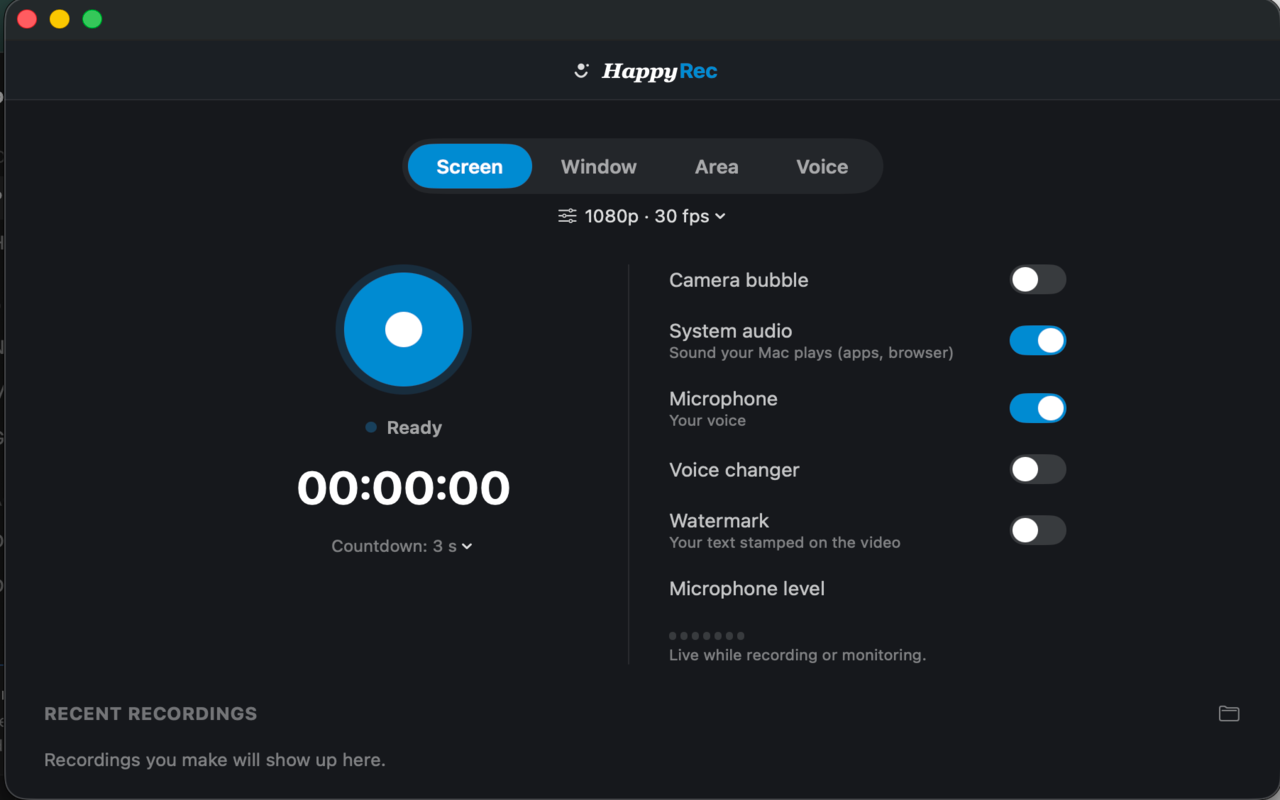
Open HappyRec and you get one window with four modes across the top — Screen, Window, Area and Voice — and a row of switches down the right-hand side. There is no project to create and nothing to configure first.
For a first recording, leave the mode on Screen. It records your whole display, which is almost always what somebody means when they ask you to record what you are doing.
The two permissions, and what they are for
The first time you record, macOS will ask for permission. This is the system asking, not the app, and you have to grant it in System Settings and come back.
- Screen Recording — required. Without it there is nothing to record. macOS asks once, and if you say no it will not ask again, so if you refuse by reflex you will need to switch it on manually later.
- Microphone — only if you want your voice in the recording. A silent screen recording needs no microphone permission at all.
Both of these are granted per application and both can be revoked at any time. HappyRec cannot see anything else on your Mac, and it records nothing at all when you are not recording.
If you refused screen recording permission and now cannot record, open System Settings, go to Privacy & Security, then Screen & System Audio Recording, and switch HappyRec on. You will need to reopen the app afterwards.
The switches that matter
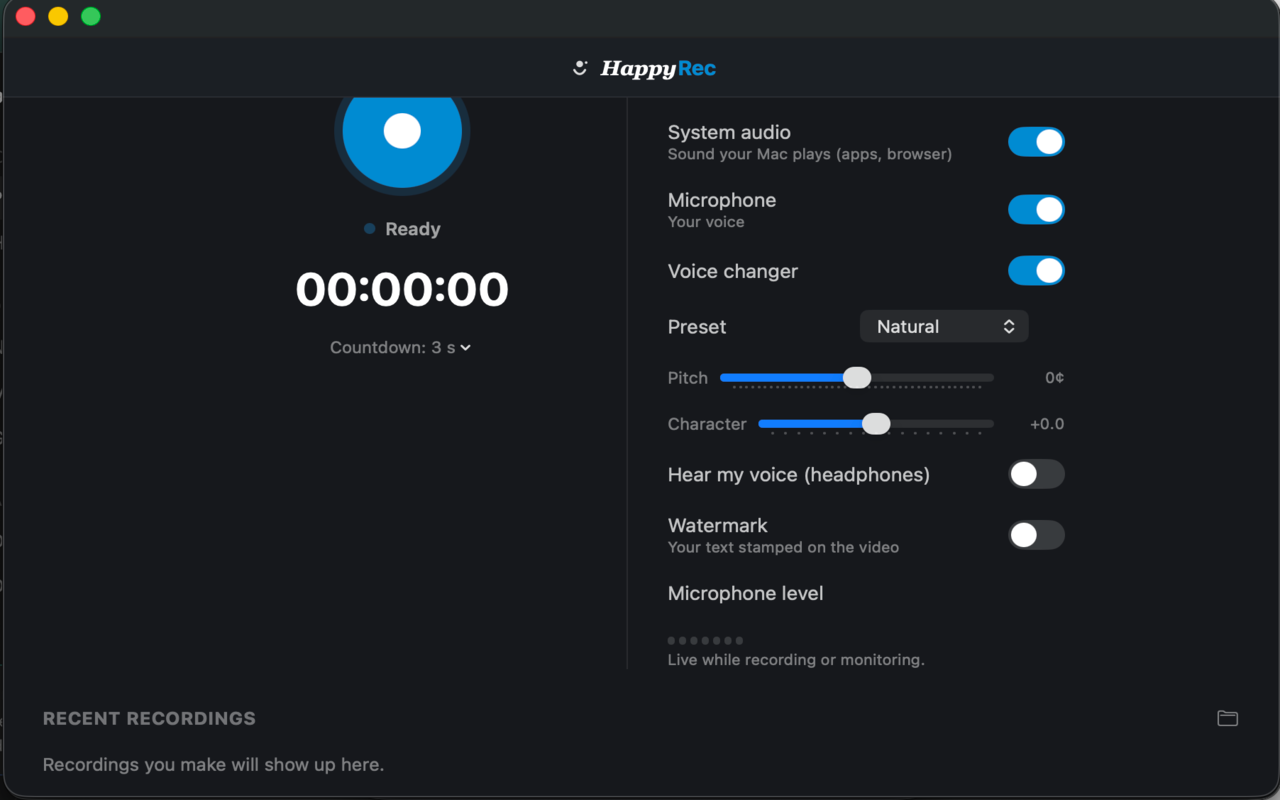
System audio puts the sound your Mac is playing into the recording — a video you are demonstrating, a notification chime, music. If you are recording a walkthrough of something with sound, this needs to be on, and it is the single most commonly forgotten switch.
Microphone records your voice. Turn it on if you are narrating and off if you are not; an open microphone in a room with other people in it captures the other people too.
Camera bubble puts your webcam in a circle in the corner. Useful for a tutorial where people should see you, unnecessary for a bug report.
Watermark stamps the video. It is off by default and stays off unless you switch it on.
Recording
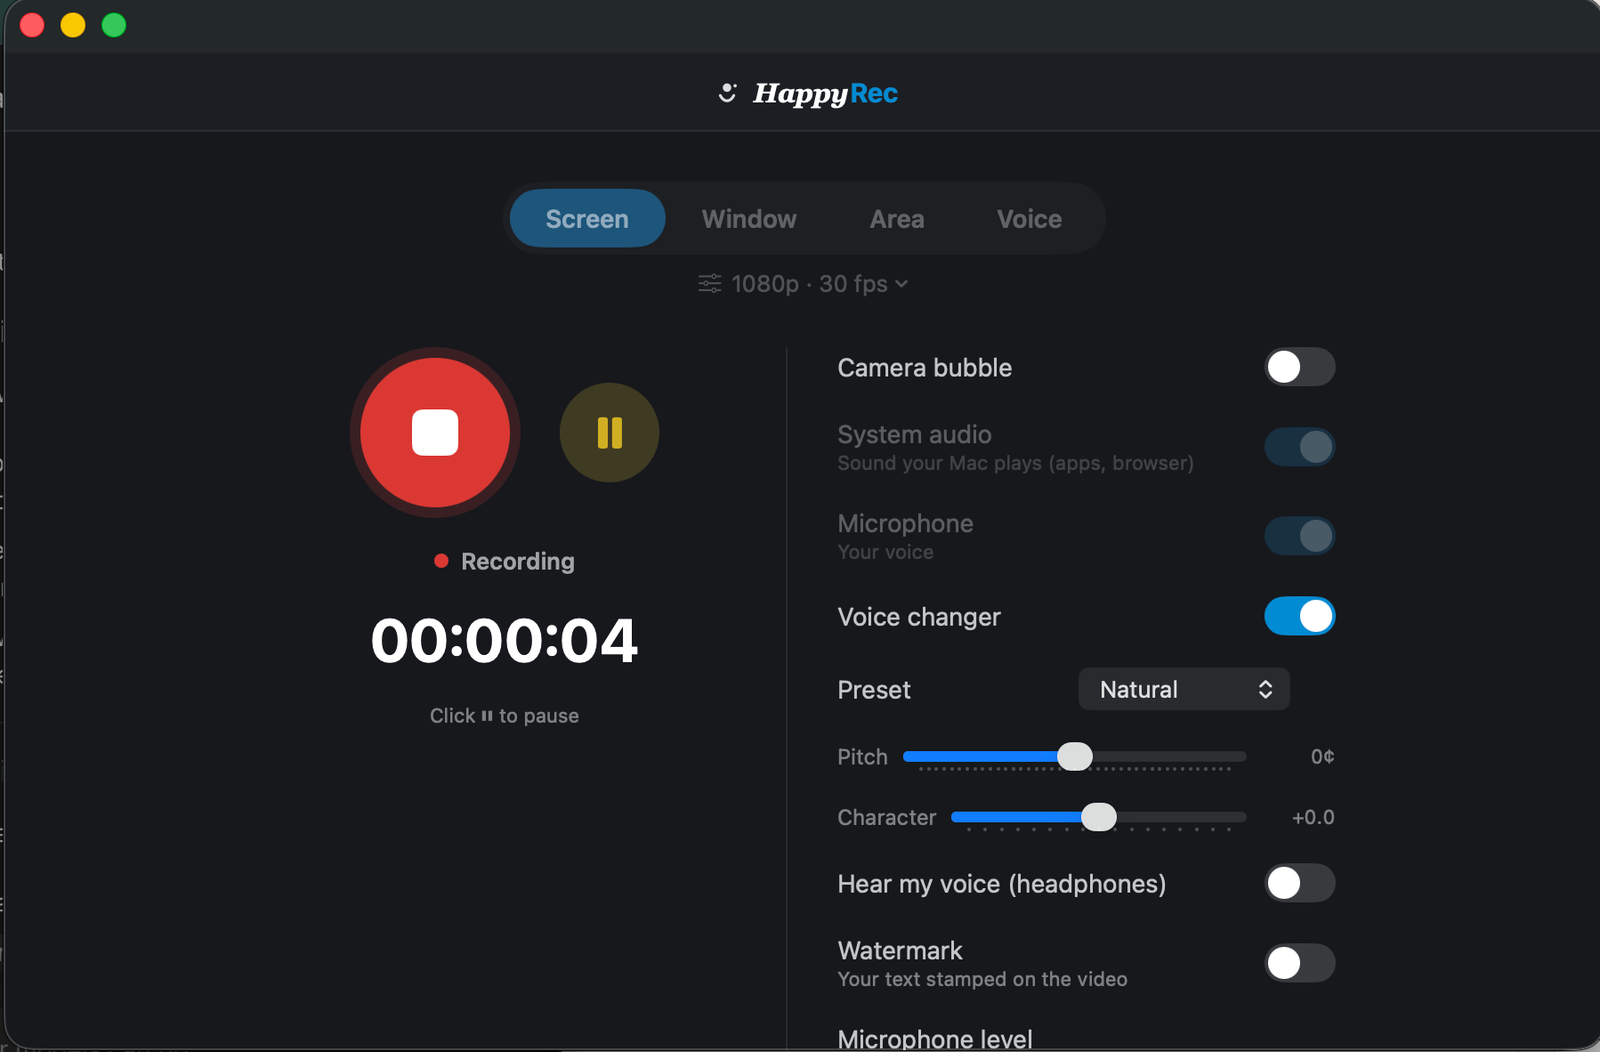
Press the big button. There is a short countdown — three seconds by default — which is there so you can get to the window you actually want to record before it starts.
While recording, the button turns red and a timer runs. You can pause, which is more useful than it sounds: pause while you find the file you meant to open, resume when you have it, and the pause does not appear in the final video.
Press stop when you are done. The file is written as you record rather than at the end, so there is no waiting and no processing bar.
The three mistakes everybody makes first time
- No sound. Both audio switches are separate and both are off by default in a fresh install. If you wanted your voice and the app’s sound, you needed both on. Check the level meter is moving before you start.
- Notifications on screen. Turn on Do Not Disturb before recording. A message from a friend appearing in your client demo is the most common reason a recording gets redone.
- The wrong screen. With two displays connected, Screen mode records one of them. Check which before you start, or use Window mode and pick the exact window instead.
The first two take five seconds each and save you a re-record.
Where the file goes
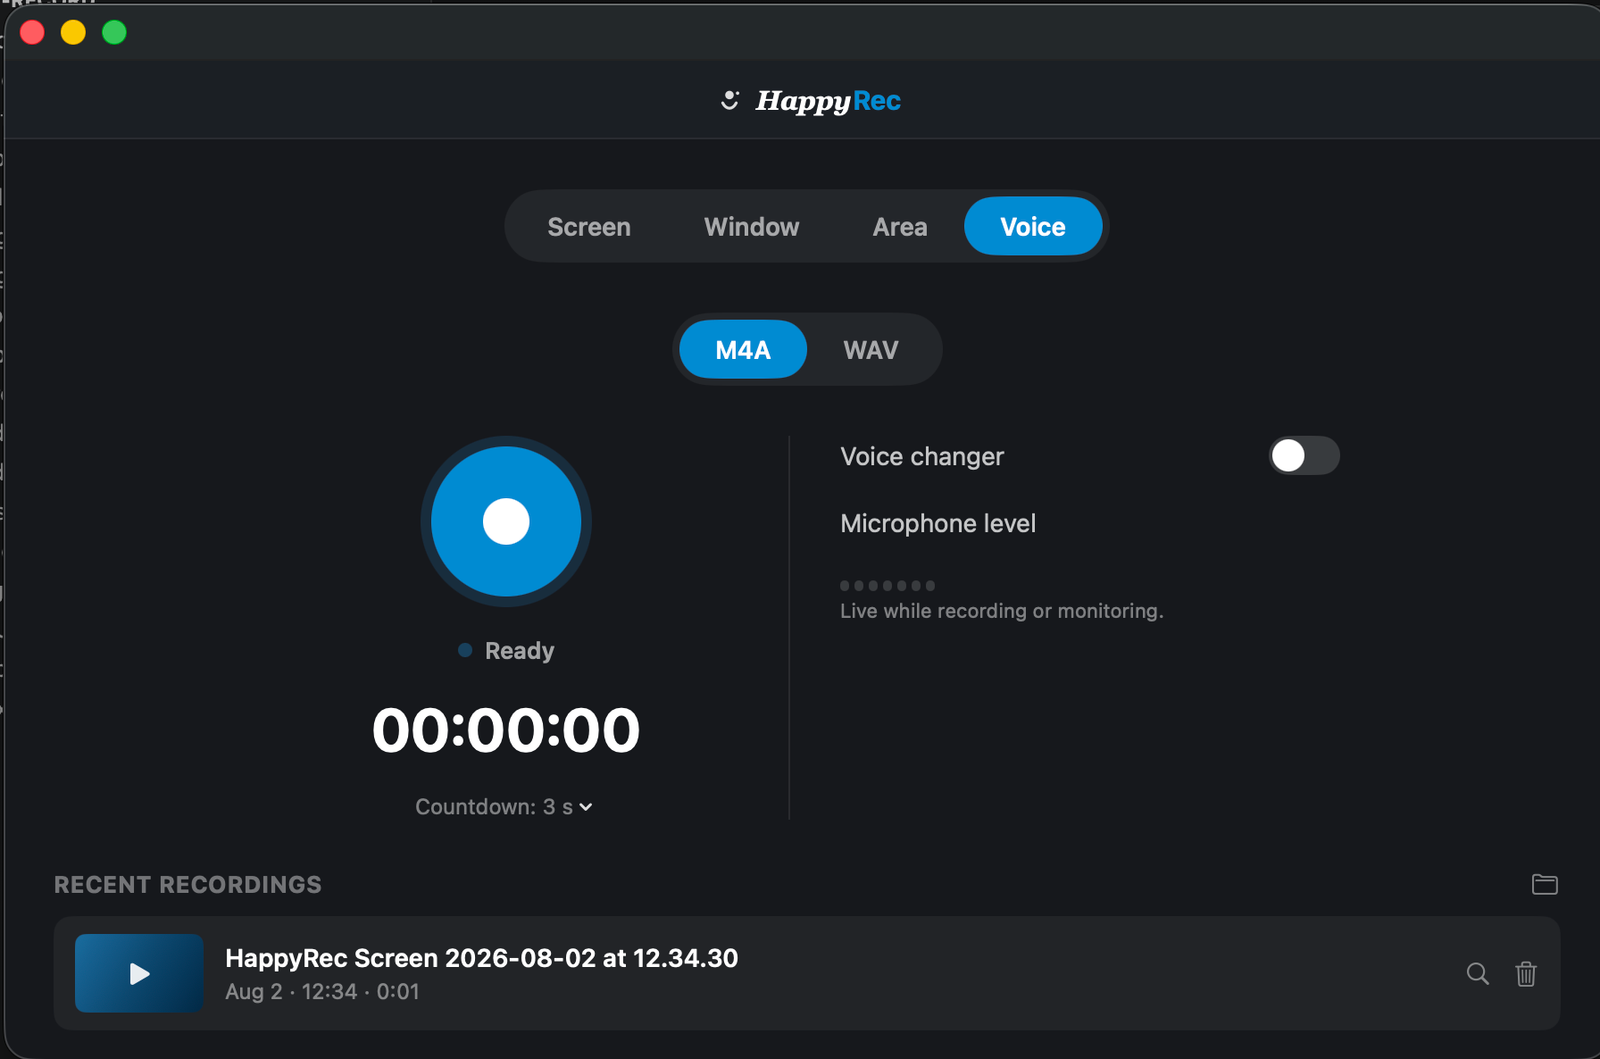
Recordings appear in the Recent recordings list at the bottom of the window as soon as they finish. Click one to play it, or use the small button beside it to reveal the file in Finder.
The file is saved to a folder you choose the first time, on your own Mac. Nothing is uploaded anywhere. There is no account, no cloud, and no sign-in — which also means there is nothing to lose access to if you stop using the app.
Getting the sound right
Sound is where most screen recordings fail, and it fails silently — you find out when you play the file back and there is nothing there.
The two sources are separate on purpose. System audio is what your Mac is playing: a video, a game, a notification, music. Microphone is you. A tutorial usually wants both. A bug report usually wants system audio only. A voice-over for slides wants microphone only.
Before you press record, look at the microphone level meter and say something. If it does not move, the microphone is not reaching the app, and no amount of recording will fix that afterwards. Three things cause it, in order of how often we see them: the wrong input device is selected, a hardware mute switch on a headset is on, or another application — usually a video call that was never fully quit — is holding the microphone.
Headphones, always
If you are recording your voice and system audio at the same time, wear headphones. Speakers put the system audio back into the microphone, and the result is an echo that is impossible to remove afterwards.
This is not a limitation of the app; it is physics, and it affects every recorder. Headphones solve it completely.
How long can a recording be
There is no time limit. The file is written continuously while you record, so a two-hour session uses no more memory than a two-minute one, and if something goes wrong at ninety minutes you still have ninety minutes of usable file rather than nothing.
What does grow is the file itself. A screen recording of a Retina display at full resolution is large — plan for roughly a gigabyte for every ten minutes at the highest setting. If you are recording something long that will be watched in a browser, the lower resolution setting produces a file a quarter of the size that most people cannot tell apart.
The one thing worth checking before a long recording is free disk space. A recorder that runs out of room mid-take is a bad afternoon.
The countdown, and why it exists
Three seconds between pressing the button and recording starting sounds like an annoyance until the first time you use it.
It is the gap in which you switch to the window you meant to record, close the app you forgot about, and put your hands back on the keyboard. Without it, every recording begins with a shot of you clicking away from the recorder, which is the part everybody trims out afterwards.
You can change it or turn it off, and the small number next to the timer is where. Most people leave it at three and stop noticing it.
Small things that make a recording look deliberate
- Turn on Do Not Disturb. One click, and no message from anybody appears in your video.
- Close the tabs you are not using. A browser with thirty tabs reads as chaos even if nobody looks at them.
- Increase the text size. What is comfortable on your display is unreadable in a video somebody watches on a phone.
- Move the mouse deliberately. Slow movements are easy to follow; fast ones make people rewind.
- Say what you are about to do before you do it. “I am going to open settings” and then open settings, rather than the other way round.
None of these are about the software. They are the difference between a recording somebody watches once and understands, and one they have to watch twice.
Common questions on the first day
Why is my recording so large?
Because a screen is a lot of pixels. A Retina display recorded at full resolution produces roughly a gigabyte for every ten minutes. Drop to the lower resolution setting, or record a window or an area instead of the whole screen, and the file becomes a fraction of that with no visible difference for anything watched in a browser.
Can I record a video call?
You can record your own screen during a call, and system audio will capture the other people. Your own voice needs the microphone switch. Whether you should is a different question — in most places you are expected to tell the other participants that you are recording, and it is good practice everywhere.
Why does the recording start three seconds after I press the button?
That is the countdown, and it exists so you can get to the window you actually want to record. The small number beside the timer changes it, and it can be switched off.
Where did my recording go?
The Recent recordings list at the bottom of the window, and in the folder you chose the first time you recorded. There is no cloud copy and no account — a recording exists in exactly one place on your own Mac.
What to do next
Once the first recording works, three things are worth knowing:
- Window mode records one application and follows it if you move it, which is cleaner than the full screen for most demonstrations.
- Area mode lets you drag a box around just the part of the screen that matters.
- Voice mode records audio only, which is what you want for a voice note or a narration track.
All four modes are the same app and the same switches. There is nothing new to learn for any of them.
HappyRec is free and runs entirely on your Mac. If you record anything regularly — bug reports, walkthroughs, lessons, voice notes — it is worth having in the menu bar rather than looking for a tool each time you need one.